Structuring Content
The login area for Cascade is https://tamiu.cascadecms.com/.
The Basics
Using Cascade's row and column structuring, content managers can quickly build a page to their liking. Your vision will come together on a web page with a few clicks.
Rows
Rows can be added to your page by clicking the green plus sign located in the top right corner of a row's content.
By default, a row's type is set to Editor. When set to this type, content managers are able to add columns (explained later in this page) and use Cascade's row editor to include text, images, and video.
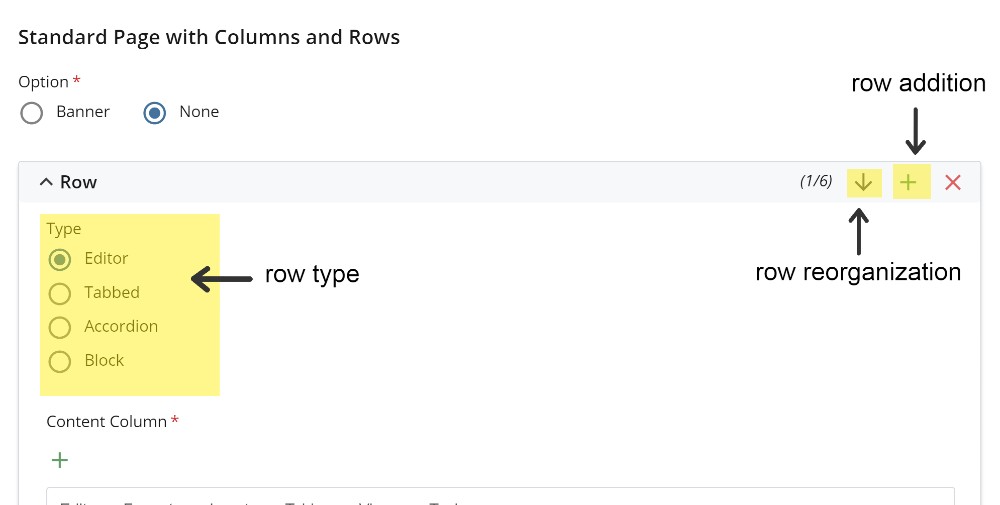
Content managers may opt for the Tabbed and Accordion row type to condensed information. The Block row type is chosen when specific snippets are built that can be reiterated throughout multiple pages, such as an office directory or event table.
ProTip: Need to reorganize your rows? Use the arrow to the left of the green plus sign to move individual rows higher or lower within your page.
Columns
Sometimes, splitting up content into rows is an effective way to organize content. Other times, a content manager may want to add an image or video on the side of text content. To do so, columns are used. Before delving deeper, here are a few examples of how columns can be used to structure your content.
Text Content + Media

Example Content
This is example text content. After this sentence, the text being used will be placeholder so readers can get a sense of how they can use columns to bring their pages to life. Lorem ipsum dolor sit amet, consectetur adipiscing elit, sed do eiusmod tempor incididunt ut labore et dolore magna aliqua. Ut consequat semper viverra nam libero justo laoreet sit. Morbi tincidunt ornare massa eget egestas purus viverra accumsan in.
Lorem donec massa sapien faucibus et molestie. Quam nulla porttitor massa id. Morbi blandit cursus risus at ultrices. Dui faucibus in ornare quam viverra orci. Justo eget magna fermentum iaculis eu non. Egestas dui id ornare arcu odio. Risus viverra adipiscing at in tellus. Tempus iaculis urna id volutpat lacus laoreet. Bibendum at varius vel pharetra vel turpis. Senectus et netus et malesuada fames.
Icon Row
Hobbies
Chess
Table Tennis
Painting
Now that you've seen some of the capabilities columns provide, let's begin adding columns into your page.
Adding the First Row
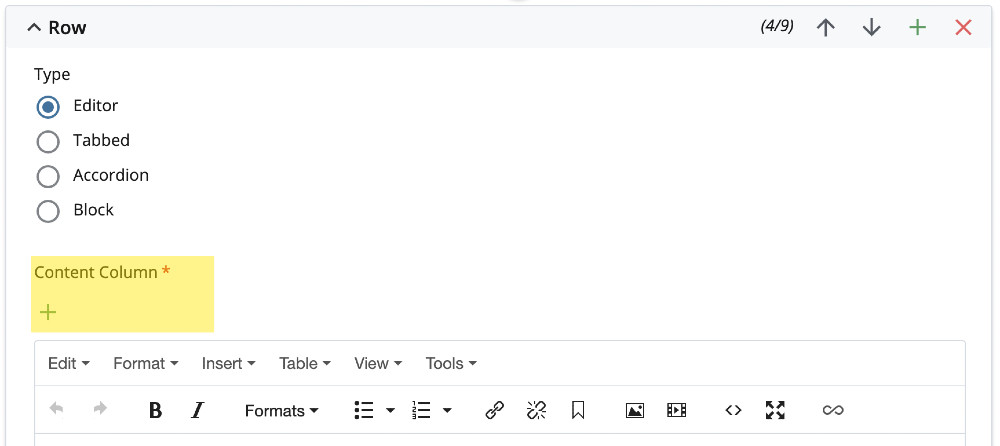
To add in the first row, click on the green plus sign found under the Content Column heading in the row's section.
Adding/Reorganizing Subsequent Row
Similar to reorganizing and adding subsequent rows, adding additional columns is as simple as clicking on the green plus sign found above each column toolbar. To reorganize the columns, use the grey arrows above the toolbar. Keep in mind, columns are arranged from left to right.
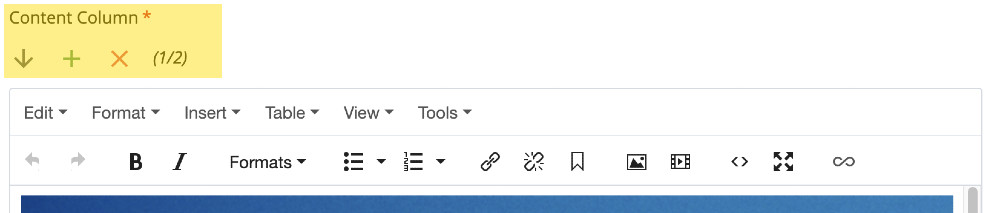
Although up to six columns can be created in a row, content managers may find that column sizes may get too small to properly house content at that level.
Tables
Tables are excellent for structuring data into a compact table. Content manager uses that may call for a table include an office directory, event schedule, and statistical expression.
ProTip: For an in-depth guide on tables, head over to our dedicated table creation page.
Media: Images & Videos
Images and videos bring your content to life, so content managers should try to incorporate these types of media in their page's content. For images, the best practice is to use a photo that is located within Cascade that is under your management. This ensures that a photo remains live unless it is deleted by a content manager. On the other hand, it is easiest to use an existing external link (from platforms such as YouTube and Vimeo) to add in video to your pages.
Images
To begin inserting an image, position your cursor within your content where you would like to insert your photo, then click. From the Editor toolbar, select the "Insert/edit image" icon (highlighted below).

If the desired image is in the Cascade system, choose the "Internal" image type. Click on the "Choose File" button under the Image Source section and browse for the image. If the image is hosted externally, choose the "External" image type, and fill in the web address in the Image Source section.
Keep in mind all audiences and provide a brief image description for visitors that may be visually impaired.
Lastly, stylings can be applied to an image in the Styling section. The most common stylings content managers use for images include "Image align - Center" and "Image shape - Circle". When using the "Image shape - Circle" option, be sure your image has a square (1:1) ratio.
Videos
To begin inserting a video, position your cursor within your content where you would like to insert your video, then click. From the Editor toolbar, select the "Insert/edit media" icon (highlighted below). Under the General tab, find the Source heading and insert your video link.
